
In the past I have used my Canon EOS 600D for astrophotography. The noise performance on this camera is quite good and I am very happy with its performance (for now). In the future somewhere I will probably upgrade to a 6D. The performace of the 600D (and 6D) is limited by the infra red (IR) cut filter that is installed in front of the CCD. This blocks the infra red light, that is invisible, from reaching the CCD and recording a very red looking image.
A large proportion of the light coming from deep space objects such as galaxies and nebulae is in the infra red part of the light spectrum and is therefore lost when you take a photo with a normal DSLR camera.
This project aimed to remove the IR cut filter from my old Canon 350D and replace it with a special filter that transmits the H-Alpha and S-II light. I used a Baader ACF2 filter that I purchased on-line from Astro Shop.
There are a lot of websites with detail, step-by-step procedures for doing the filter replacement. I used the following website by David Campbell. It was very good and I did not have any serious problem with any of the steps.
Another website describing the process for the 350D is Life Pixel ,
I need to make the point that you should not attemp this if you are not very comfortable with taking apart your DSLR and using a soldering iron on the delicate circuit boards and a sharp knife / glue / silicon on the optical components of the camera. One slip and you could be trashing the camera as nobody will repair it for you.Typically you will be doing this modification if this is your second or third camera that is not used regularly anymore. Mine was sitting on the shelf so a disaster during the modification process would not have been a problem. I found the most difficult part the reconnection of the delicate ribbon cables.
I was quite successful and the 350D is alive and well and taking great photos with a lot of colour detail coming out of the Orion nebula and Carina nebulae. I will post photos of these once I have finished processing them.
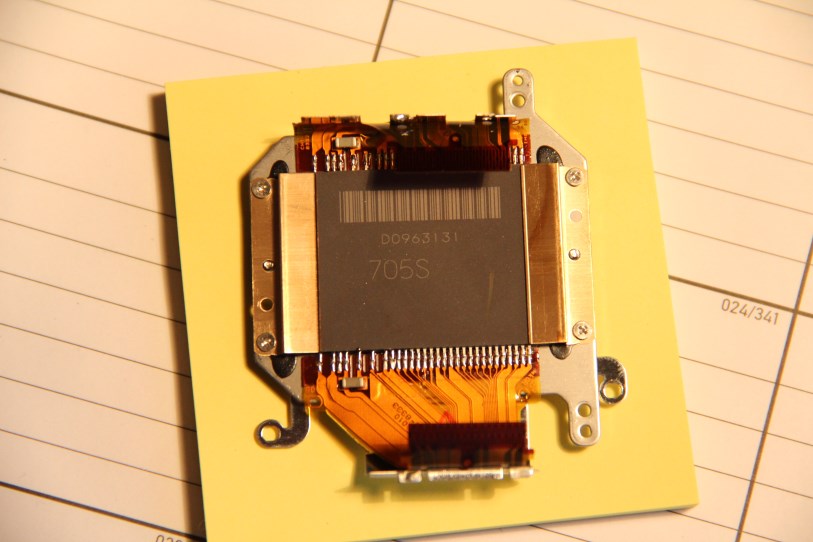
Here are a few photos of the modification process.


Opening up the camera

Removing circuits boards and disconnecting the ribbon cables

The back of the CCD is now visible

Taking the CCD assembly off the camera

This is the shutter from the inside

The surface of the CCD chip visible through the IR cut filter

Removing the IR cut filter from the CCD assembly. It is glued in place with a silicon type glue and has to be cut out with a sharp knife.


The new Baader ACF2 filter is now glued in place with silicon sealer applied with a thin syringe and needle. In my case the needle was very thin and it look a lot of pressure to get the silicon out. A slightly larger needle would have been better.

New filter fitted back on the CCD assembly

CCD assembly back on the camera body

A few quick photos to check if it is still working ….


I tested the camera with an image of the Orion nebula. The photo was taken with 6 light frames of 30 seconds each, f/2.8, ISO-800. Lens was a Canon Macro EFS 60mm lens and the mount was an iOptron SkyTracker on a Meade tripod. I had four dark frames and stacked with DSS, processed with PS CS2 and Lightroom. Light conditions was not very good, lots of cloud around and light polution (as always…). Still need to sort out the light gradient on the image.
I used a trial version of Backyard EOS to help me with the focussing of the 350D. This camera does not have a live view function and it makes it quite difficult to achieve sharp focus.

